The Mac Pro contains four accessible hard-drive bays. Mac OS X comes with easy to use RAID software. Put these together, and you can quickly build a backup system using redundant disks, so that if one drive fails, another takes its place.
Building a RAID (meaning “redundant array of independent disks”) like this may be ideal for backups, but isn’t as useful for other applications of RAID technology (such as striping for great video encoding performance, and so on). This because the RAID is controlled by software, so is on the slower side. It’s possible to put an optional hardware-based RAID controller into the Mac Pro, but it is pricey and complete overkill for backups. The speed doesn’t really matter for backup use, especially when using Time Machine, since it is all done unnoticed in the background anyway.
Preparation
The key thing about making a RAID is that you need to use multiple identical disks. As mentioned, speed doesn’t really matter for backups. In fact, you are usually better off buying the slowest disks you can find because they a) will still be fast enough, b) are cheaper, c) are usually quieter and d) usually draw less power. The Mac Pro uses Serial Advanced Technology Attachment (Serial ATA or SATA) disks. The drives used in this post are a pair of 1.0TB Western Digital Caviar Geen drives, due to their lower power consumption and sound output. These drives use a variable number of rotations per minute, but are rated at between 5400 and 7200 rpm. So, these are not speed demons, but they don’t need to be. At the time of writing, Other World Computing had the best deal on this particular drive.
In addition to the drives, you will need a Mac Pro, one functional hand, and a standard phillips screwdriver. You might also want a grounding strap to prevent electrical damage to the components, particularly in dry climates or if you tend to get shocked by light switches a lot where you live.
To start the installation, shutdown your Mac Pro.
Hardware installation
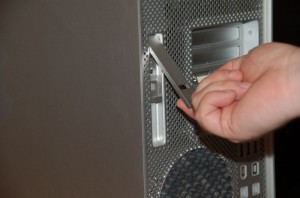
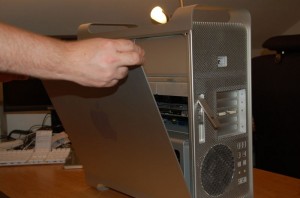
Pull out the tab on the back of the Mac Pro, pull the top of the side panel out, then remove the side panel (click on any of the images in this post to see a larger version):
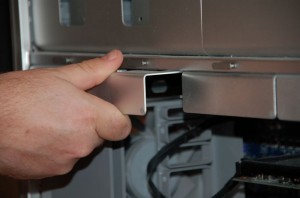
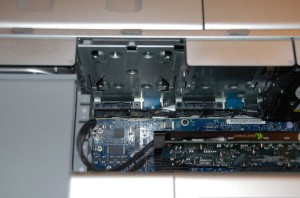
About a third of the way down, find the four numbered drive caddies. If this is a new machine, chances are that drive bay #1 holds the primary disk and the other three caddies are empty. These instructions assume that this is the case, and that you’ll put your RAID drives into bays #2 and #3. Adjust this to match your machine accordingly. It doesn’t matter which of the bays the RAID drives are in. Give a tug to caddy #2 (or whatever) and slide it out. It should come out without much effort; it is not secured with screws or anything:
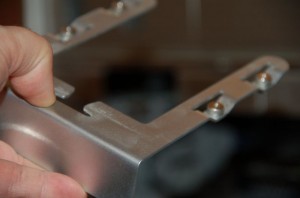
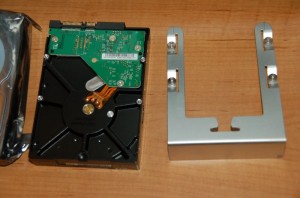
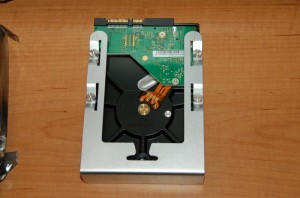
Before unwrapping your drive from its anti-static bag, hold the bag and touch a metal part on the frame of the Pro. This should lessen the chance of a spark that could damage the drive. Unwrap the first drive and find the four silver holes at the edge of the side with the visible circuit board. Note that these are in the same orientation as the screws on the caddy. Line the caddy up with these holes and connect with a phillips screwdriver. Note that the “open” end of the caddy should point towards the back of the drive (where the copper pins are).
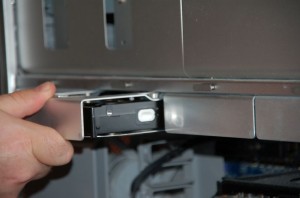
Put the caddy with the mounted drive back into the machine by locating the tab-like rails into which the caddy slides. These should fit very naturally. Once in place, slowly but firmly push the caddy all the way back in. It should be flush with the rest of the caddies.
Repeat the process with the second drive, using bay #3. Once done, replace the side panel by lining up the bottom of it with the space in the machine, then tilting the top back in place. Once flush, close the tab on the back of the machine to lock the side in place. Boot the Mac Pro.
Software setup
If all goes well, once you boot up, you will see messages asking you
if you want to format the new drives. Say no to (or cancel) these
messages. You’ll need to reformat these drives as a RAID, so no point in
formatting them just now. Instead, launch the “Disk Utility” application
(usually found in Applications/Utilities).
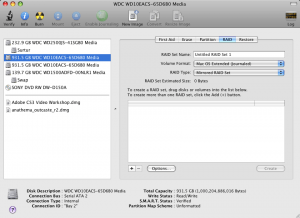
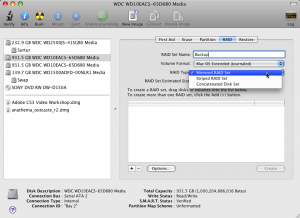
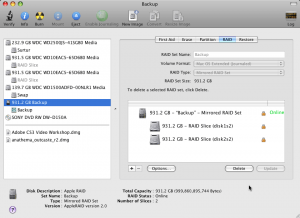
When it comes up, you should see the new drives listed on the left, along with your primary drive and your DVD drive. From the tab selections at the top of the right-hand section of the window, click “RAID”. Enter a name for your new RAID, such as “Backup”. Make sure “Raid Type:” is set to “Mirrored RAID set”.
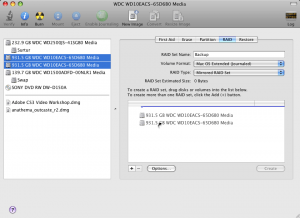
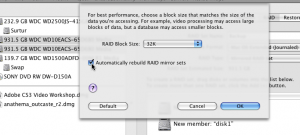
Now select one of the new drives from the list at the left. Holding down the shift key, click on the other new drive, to add it to the selection as well. Drag the two selected drives into the large white space on the right-side section of the window. This will add two entries to this list, saying something like “New member: ‘disk 0’”. Below this list, click “Options”. Make sure “Automatically rebuild RAID mirror sets” is checked, and click “OK”. (This setting will correct problems in the RAID if one of the drives has an error.)
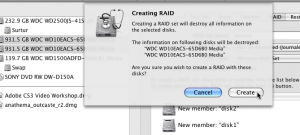
Click “Create”. A confirmation screen will come up, warning you that creating this RAID will completely erase the drives. This is a good time to make doubly sure that you have selected your new drives into the RAID, and not any other drives. When satisfied this is so, click “Create”. A progress bar will appear as the RAID is being created. When finished, you should see the new RAID show up in both the left side list, and in the right side section. While the Disk Utility will still show you the individual disks, everything else will see the RAID as if it is a single drive.
Note that the capacity of the RAID as a whole matches that of one of the drives, not their sum. This should be as you would expect. The whole point of the RAID is to act as a “virtual disk” and when a byte is written to that disk, the RAID software writes that byte to the same spot on both of the drives, making sure they each have a copy of the same data. Thus, either one can fail, and you still have a working copy of the data.
A short digression
Before setting up this RAID for use with Time Machine, a quick
digression. For troubleshooting purposes, it is sometimes useful to get
more information about the drives you are using. Six months down the
road, for example, you might have forgotten which drive you put into
which bay. The System Profiler application can provide a bunch of
information about your system, including the drives. You can launch this
app either directly from Applications/Utilities or by
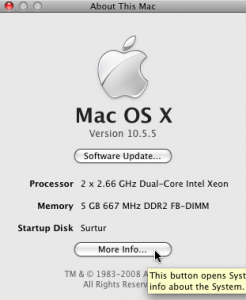
selecting “About This Mac” from the Apple menu, then clicking “More Info…”.
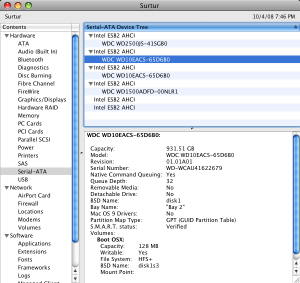
Once the System Profiler launches, clicking the “Serial-ATA” section will show a list of the drives in the machine. If you click on one of your new drives, the bottom right section will display all sorts of information about the drive. Two more useful bits of information are the “Bay Name” setting, which tells you in which drive bay the drive is physically installed, and the “BSD Name” field, usually set to something like “disk1s3”. This code is needed for a number of command line disk manipulation tools, so is good to know when troubleshooting problems.
Time Machine
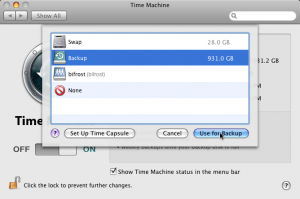
Setting up Time Machine to use this RAID is the same as using any other drive. Just “Open Time Machine Preferences” from the Time Machine menu icon (by the clock in the menu bar), or by selecting “System Preferences…” from the Apple menu, then going to the Time Machine section. Once there, turn Time Machine on and select the RAID.
